1. 투명배경 업로드

2. 기본위젯 설정

<table height="600"><tbody><tr><td /></tr></tbody></table>

3. image map 설정(메뉴 세개인 기준)

<img src="#이미지경로" border="0" usemap="#00" /> 
<map name="00" id="00">
 <area shape="rect" coords="10,465,155,515" href="#링크" target="_blank" /> 
</map>
<img src="#이미지경로" border="0" usemap="#00" /> 
<map name="00" id="00">
 <area shape="rect" coords="10,465,155,515" href="#링크" target="_blank" /> 
</map>
<img src="#이미지경로" border="0" usemap="#00" /> 
<map name="00" id="00">
 <area shape="rect" coords="10,465,155,515" href="#링크" target="_blank" /> 
</map>

4. 레이아웃 설정

5. 타이틀 제거

6

Table2excel 을 사용해 게시판 리스트를 엑셀로 다운로드 출력가능하다

1. 다운로드 버튼을 구현하고, 클릭 시 함수를 걸어준다.

2. 테이블 id를 설정

<input type="button" class="btn" value="excel 다운" onclick="ReportToExcelConverter()">
	
    <table id="table2excel">
    	<tr>
          <th>번호</th>
          <th>제목</th>
          <th>이름</th>
          <th>날짜</th>
        </tr>
        <tr>
       	  <td>1</td>
       	  <td>제목입니다</td>
       	  <td>작성자</td>
       	  <td>2019.10.22</td>
		</tr>
   </table>

3. Script 삽입

<script src="//cdn.rawgit.com/rainabba/jquery-table2excel/1.1.0/dist/jquery.table2excel.min.js"></script>
<script> 
  function ReportToExcelConverter() { 
  $("#table2excel").table2excel({ 
  exclude: ".noExl", 
  name: "Excel Document Name", 
  filename: "report" +'.xls', 
  fileext: ".xls", 
  exclude_img: true, 
  exclude_links: true, 
  exclude_inputs: true }); 
  };
 </script>


완료

[그누위즈] 에서 개발하신 텔레그램으로 푸쉬알람 받기 기능이다. 유용하게 사용중이다. 

[출처 : http://gnuwiz.com/bbs/board.php?bo_table=plugin_tip&wr_id=12&sca=%ED%94%8C%EB%9F%AC%EA%B7%B8%EC%9D%B8+%ED%8C%81


텔레그램의 채팅 bot을 이용해서 그누보드의 회원가입, 게시글 작성, 쪽지 전송 등

사이트에서 발생하는 여러가지를 알림으로 받아 볼 수 있도록 하는 플러그인 입니다.


상단에 첨부한 파일을 그누보드가 설치된 원하는 디렉토리에 넣어주시면 됩니다.

저의 경우에는 www/bbs 디렉토리에 해당 telegram_class.php 파일을 넣어두도록 하겠습니다.


우선 텔레그램의 계정이 있어야하며 텔레그램이 데스크탑에 설치되어 있어야합니다.

위의 과정은 모두 되어있다는 가정하에 진행하겠습니다.


1.https://telegram.me/botfather 링크에 접속합니다.

위와 같이 링크로 접속시 "Telegram Desktop 열기" 버튼을 클릭합니다.

그러면 BotFather 이라는 봇의 아버지와의 채팅이 시작됩니다.

이제 하단의 "START" 버튼을 클릭하고 채팅을 시작합니다.
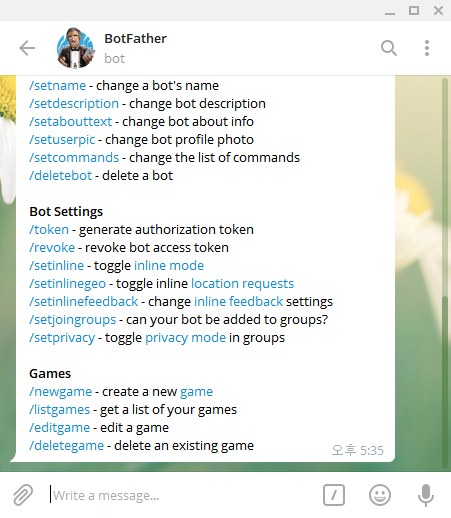
위와 같이 채팅이 시작되면

채팅창에 아래와 같이 /newbot 을 입력하고 엔터를 누릅니다.

이어서 아래와 같이 자신이 생성할 봇의 이름을 입력합니다.

저는 이름을 "gnuwiz" 라고 생성 하겠습니다.


다음으로 본인이 생성한 "봇 이름_bot" 이라고 채팅창에 입력후 엔터를 누릅니다.

저 같은 경우에는 봇 이름이 "gnuwiz" 이기 때문에 "gnuwiz_bot" 이라고 입력했습니다.

정상적으로 봇이 생성되었다면 아래와 같이 고유 token 값이 출력됩니다.

해당 부분은 바로 사용하기 때문에 가지고 있어야합니다.

그리고 채팅창에서 뒤로가기 버튼을 클릭하고

친구목록중 친구를 찾는 부분에 방금 생성한 봇 아이디를 입력합니다.


그리고 방금 찾은 봇 아이디와 채팅을 시작합니다.

채팅창에는 아래의 양식으로 입력후 엔터를 누릅니다.

https://api.telegram.org/bot발급받은토큰값/getUpdates

위와 같이 해당 링크를 입력후 링크를 클릭합니다.

그러면 브라우저에 해당 링크가 열리면서 json 형태로 결과값을 리턴 받는데
우리가 필요한 값은 해당 부분중 id 부분의 고유 값이 필요합니다.


여기 까지 잘 따라왔다면 이제 첨부파일 telegram_class.php을 열어서 해당 부분에 각 값을 넣어주면 됩니다.

$chat_id 변수에는 방금 받은 id 값을 넣고

$bot_token 변수에는 이전에 받는 token 값을 넣습니다.

<?php

/* telegram_class.php */


class telegram_msg {


    private $chat_id = '427588447'; // id 값

    private $bot_token = '541841220:AAGrqV3dJpLX98utPtn2XFzEgZ_lHXaVIYo'; // token 값


    public function __construct() {


    }

...................

?>


위와 같이 값을 넣었다면 이제 텔레그램 푸쉬를 사용 할 준비가 되었습니다.

마지막으로 그누보드의 특정 실행 구간에 해당 클래스를 실행 할 소스를 추가해야합니다.


저는 예시로 회원가입, 게시글 작성, 쪽지 전송 부분에서만 작동하도록 만들어 놓았습니다.


1.회원가입시 알림

www/bbs/register_form_update.php 파일을 열어서 사용자 코드 실행 부분 아래에

해당 소스를 붙혀넣습니다.

<?php

/* www/bbs/register_form_update.php */


// 사용자 코드 실행

@include_once ($member_skin_path.'/register_form_update.tail.skin.php');


// 텔레그램 PUSH 코드 실행(gnuwiz)

@include_once(G5_BBS_PATH.'/telegram_class.php');

$telegram_msg = new telegram_msg();

$res = $telegram_msg->send();

?>


2.게시글 작성시 알림

www/bbs/write_update.php 파일을 열어서 사용자 코드 실행 부분 아래에

해당 소스를 붙혀넣습니다.

<?php

/* www/bbs/write_update.php */


// 사용자 코드 실행

@include_once($board_skin_path.'/write_update.skin.php');

@include_once($board_skin_path.'/write_update.tail.skin.php');


// 텔레그램 PUSH 코드 실행(gnuwiz)

@include_once(G5_BBS_PATH.'/telegram_class.php');

$telegram_msg = new telegram_msg();

$res = $telegram_msg->send();

?>


3.쪽지 전송시 알림

www/bbs/memo_form_update.php 파일을 열어서 사용자 코드 실행 부분 아래에

해당 소스를 붙혀넣습니다.

<?php

/* www./bbs/memo_form_update.php */


// 실시간 쪽지 알림 기능

$sql = " update {$g5['member_table']} set mb_memo_call = '{$member['mb_id']}' where mb_id = '$recv_mb_id' ";

sql_query($sql);


// 텔레그램 PUSH 코드 실행(gnuwiz)

@include_once(G5_BBS_PATH.'/telegram_class.php');

$telegram_msg = new telegram_msg();

$res = $telegram_msg->send();


?>


정상적으로 해당 부분에 소스를 추가했다면

아래와 같이 특정 동작시 알림을 받아 볼 수 있습니다.

최신글 스킨에서 


이런식으로 활용하기


<? php 
$profile_file = get_file($bo_table, $list[0]['wr_id']);
$header_file = get_file($bo_table, $list[1]['wr_id']);
?>
<? php $profile_src = $profile_file[0]['path'].'/'.$profile_file[0]['file']; ?>
<? php $header_src = $header_file[0]['path'].'/'.$header_file[0]['file']; ?>


관리자 확인


<?php if ($member[mb_level] >= 8 | $is_admin == 'super') { ?>

사용


로그인확인

if (!$is_memebr) {

로그아웃중

} else {

로그인중

}


if(defined('_INDEX_')) { // index에서만 실행

    include G5_BBS_PATH.'/newwin.inc.php'; // 팝업레이어

}


//전부띄우기 

<?php

    include G5_BBS_PATH.'/newwin.inc.php'; // 팝업레이어

?>


MYSQL.  Plugin ‘unix_socket’ is not loaded


  • Sudo service mysql stop
  • Sudo mysqld_safe --skip-grant-tables &

'/var/run/mysqld' for UNIX socket file don't exists.

  • Sudo mkdir -p /var/run/mysqld
  • Sudo chown mysql:mysql /var/run/mysqld
  • Sudo mysqld_safe --skip-grant-tables &

2019-09-21T05:43:59.765032Z mysqld_safe Starting mysqld daemon with databases from /var/lib/mysql


Mysql -u root -p

'공부 > SQL' 카테고리의 다른 글

[mysql] DB백업 복구하기  (0) 2013.11.04
mysql 사용자 권한 설정  (0) 2013.08.01
mysql 사용자 계정 생성  (0) 2013.07.31
mysql 암호 재설정(mariaDB)  (0) 2013.07.25
APMSETUP 윈도우환경에서 mysql 한글 깨짐  (0) 2013.05.25

text54_viewportEnter 등록할것


let startNum1 = 0;

let startNum2 = 0;

let startNum3 = 40;

let endNum1 = 23;

let endNum2 = 38;

let endNum3 = 253;

const duration1 = 70;

const duration2 = 50;

const duration3 = 10;


function countUp1(){

if (startNum1 <= endNum1 ){

$w('#text54').text = startNum1.toString();

startNum1++;

}

}


function countUp2(){

if (startNum2 <= endNum2 ){

$w('#text56').text = startNum2.toString();

startNum2++;

}

}


function countUp3(){

if (startNum3 <= endNum3 ){

$w('#text58').text = startNum3.toString();

startNum3++;

}

}


export function text54_viewportEnter(event, $w) {

     setInterval(()=> {

countUp1();

}, duration1);

}


export function text56_viewportEnter(event, $w) {

     setInterval(()=> {

countUp2();

}, duration2);

}


export function text58_viewportEnter(event, $w) {

     setInterval(()=> {

countUp3();

}, duration3);

}


https://www.wix.com/corvid/forum/community-discussion/how-to-create-animated-number

$list[$i]['wr_name']을 

substr($list[$i]['wr_name'],0,-12)."**"


로 표시


http://gnustudy.com/bbs/board.php?bo_table=skin_board&wr_id=21

input[type=checkbox] { display:none; }

input[type=checkbox] + label { 

display: inline-block; 

cursor: pointer; 

line-height: 22px; 

padding-left: 22px; 

background: url('/img/check_off.png') left/22px no-repeat; 

}

input[type=checkbox]:checked + label { background-image: url('/img/check_on.png'); }

<input type="checkbox" id="box1"><label for="box1"></label>

<input type="checkbox" id="box2"><label for="box2">동의합니다.</label>

<input type="checkbox" id="box3"><label for="box3">동의합니다.</label>


+ Recent posts